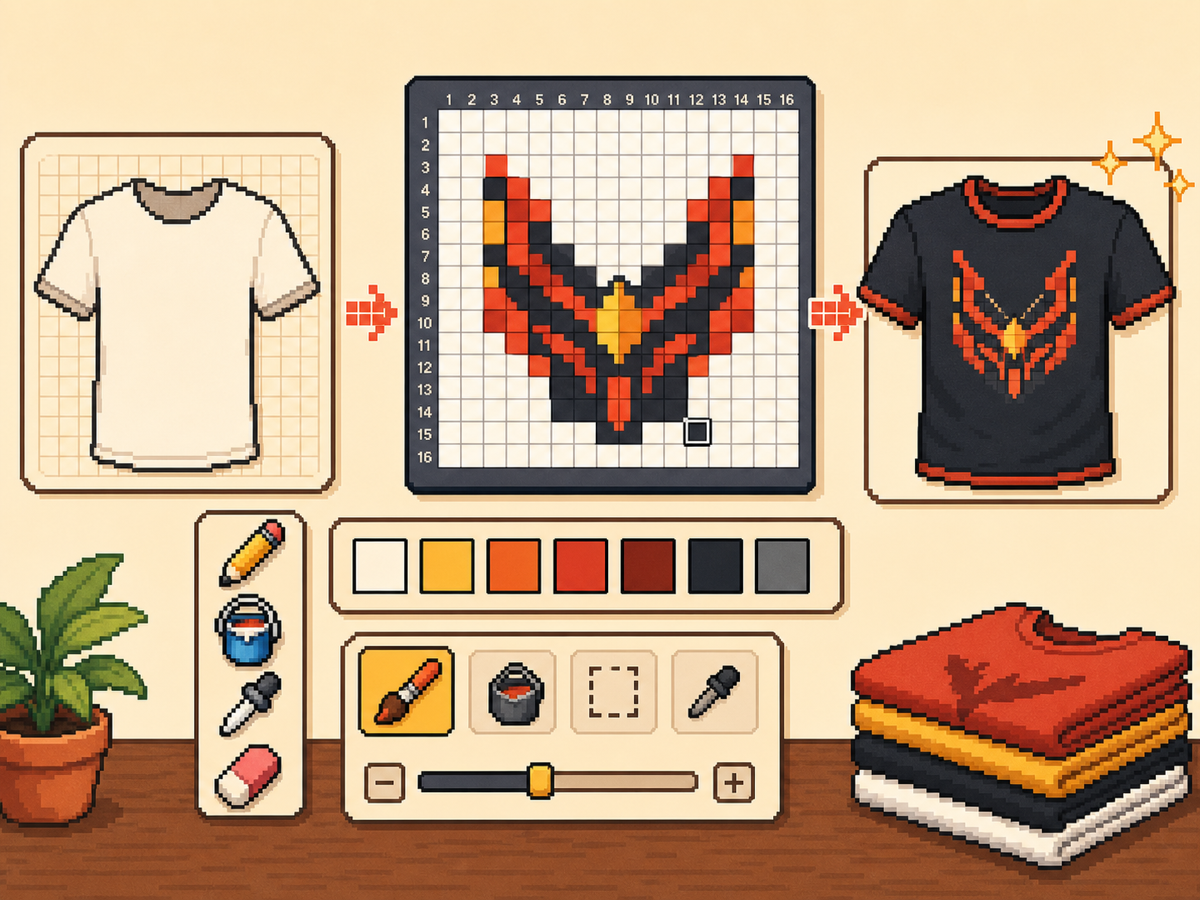
服デザイン
ピクセルグリッドで服を作る
服のデザインには読みやすい形、控えめなパレット、きれいな輪郭が必要です。ピクセルグリッドを使うと、ゲーム内へ写す前にロゴ、アイコン、ストライプ、バッジ、シャツの細部を計画できます。
確認者 リビング・ザ・グリッド editor testing - 最終更新
グリッドメーカーを開くこのガイドでわかること
Custom clothes pixel grids are small reference patterns for shirts, logos, badges, and outfit details in トモダチライフ. They work best when the design uses bold shapes, a limited palette, and clean edges that still read clearly after the art is copied by hand.
Guide Images
手順
- 大胆な服のアイデアから始めます。 シンプルな記号、チーム風マーク、バッジ、高コントラストの柄は、小さな写真の細部より向いています。
- まずは 24x24 または 32x32 を使います。 これらのサイズなら、作業時間を長くしすぎずに服の細部を読みやすく保てます。
- 輪郭を守ります。 服では小さなミスでロゴやアイコンが歪んで見えるため、きれいな輪郭が重要です。書き出す前に余計なセルを直します。
- パレットを絞ります。 身につけるデザインには少ない色を使います。大きな色面は複雑なグラデーションよりくっきり見えることが多いです。
グリッド選択とトレードオフ
| 選択 | 向いている用途 | トレードオフ |
|---|---|---|
| 16x16 | Tiny badges, sleeve marks, and simple symbols | Very quick, but only works for bold silhouettes. |
| 24x24 | Shirt icons, stripes, initials, and small outfit details | Good for wearable art that should not take long to copy. |
| 32x32 | Larger logos, character marks, and detailed clothing panels | More readable detail, but cleanup matters more. |
ピクセルグリッドに向いた服デザイン
強い服の柄は大きく読みやすい形を使います。3、4 色のシャツエンブレムは、多くの陰影を持つ細かいイラストよりよく見えることが多いです。
ロゴを変換する場合は周囲をタイトに切り抜き、最終パターンを決める前に 24x24 と 32x32 の両方を試します。
服を読みやすく保つ方法
小さいサイズでプレビューを確認します。プレビューキャンバスでまだ内容が分かるなら、服でもうまくいく可能性が高いです。
ゲーム内の面で切れたり歪んだりしないと確信できる場合を除き、重要な細部をグリッドの端に置くのは避けます。
Design Rules for Small Clothing Areas
Clothing art has less room for detail than posters or TV screens, so the best designs use one strong symbol rather than a full illustration. Think in terms of badges, stripes, initials, icons, or a single character mark.
Leave a little empty space around the design. A logo that touches the grid edge can look cramped after it is copied onto clothing, especially if the in-game surface curves or crops the artwork.
How to Test a Shirt Design Before Copying
Preview the grid at the size you expect to see in-game. If you cannot recognize the design when it is small, reduce colors, thicken the outline, or remove interior details before exporting.
Try a two-pass test: first export a simple 24x24 version, then compare it with a 32x32 version. Use the larger grid only if it adds readable information instead of extra noise.
Troubleshooting Clothing Edges
Jagged edges stand out on clothes because the design is usually seen as a single emblem. Clean the outer contour manually and remove stray pixels that sit just outside the main shape.
If diagonal lines look broken, use short stair-step patterns instead of scattered single cells. Consistent stair steps look intentional, while isolated pixels usually look like conversion mistakes.
Example Clothing Workflow
For a shirt badge, sketch the badge shape first, then add one internal symbol and one highlight color. If the design needs more than four or five colors to make sense, it may be better as a poster or TV screen grid.
For stripes or initials, copy the layout with a temporary high-contrast color before finalizing the palette. This makes spacing mistakes obvious and lets you correct the pattern before the real colors are in place.
避けたいよくあるミス
- Using photo detail on clothes. Clothing art is small. Replace photo texture with a few readable shapes before exporting.
- Ignoring edge safety. Important marks near the border may look clipped. Leave space around logos and badges.
- Adding too many shades. Complex gradients blur on clothing. Use strong contrast and fewer colors for sharper results.
関連ガイド
よくある質問
カスタム服に最適なグリッドサイズは?
シンプルなマークには 24x24、より細かい服アートには 32x32 を使います。48x48 は細部が必要な場合だけ使ってください。
服のピクセルアートは多色にすべき?
通常はいいえ。限られたパレットの方が写しやすく、服のデザインもくっきり見えます。
Are photos good for custom clothes?
Photos usually need heavy simplification before they work on clothing. Convert the photo into a bold symbol or cropped face rather than trying to preserve every shade.
How much empty space should I leave?
Leave enough border space that the design does not touch the grid edge. This makes logos and badges feel cleaner when they are copied onto clothing.