Дизайн одежды
Создание индивидуальной одежды с помощью пиксельных сеток
Дизайну одежды нужны читаемые формы, сдержанная палитра и чистые края. Пиксельная сетка поможет вам спланировать логотипы, значки, полосы, значки и детали футболок, прежде чем вы начнете копировать их в игру.
Проверено Living the Grid editor testing - Последнее обновление
Откройте создатель сеткиЧто охватывает это руководство
Custom clothes pixel grids are small reference patterns for shirts, logos, badges, and outfit details in Tomodachi Life. They work best when the design uses bold shapes, a limited palette, and clean edges that still read clearly after the art is copied by hand.
Guide Images
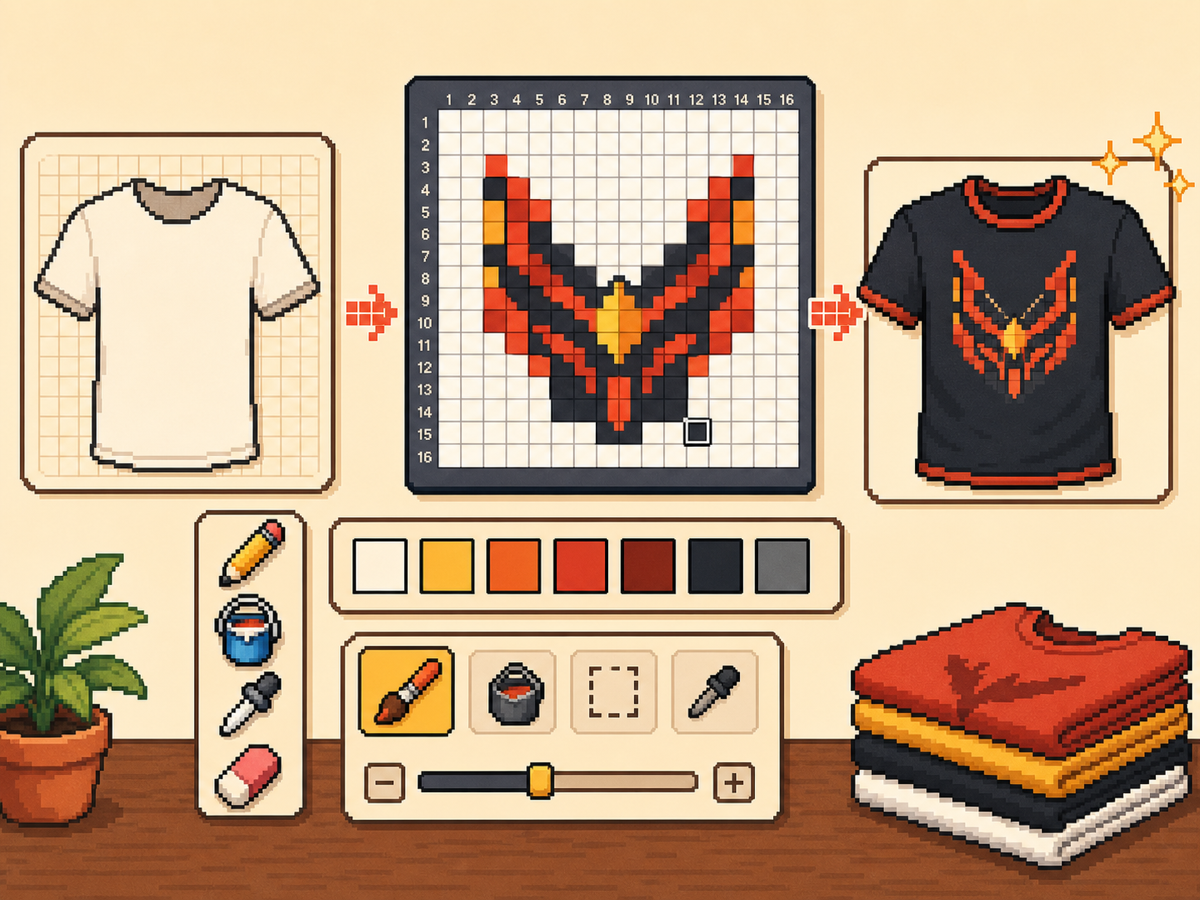
Пошаговый рабочий процесс
- Начните со смелой идеи одежды. Простые символы, знаки командного стиля, значки и высококонтрастные узоры работают лучше, чем мелкие детали фотографий.
- Сначала используйте 24x24 или 32x32. Эти размеры сохраняют читабельность деталей одежды, не превращая дизайн в длинное копирование.
- Защитите контур. Чистые края имеют значение для одежды, потому что небольшие ошибки приводят к тому, что логотипы и значки выглядят искаженными. Исправьте случайные ячейки перед экспортом.
- Ограничьте палитру. Используйте меньше цветов для носимых дизайнов. Большие цветные блоки обычно выглядят резче, чем сложные градиенты.
Выбор сетки и компромиссы
| Вариант | Лучшее для | Компромисс |
|---|---|---|
| 16x16 | Tiny badges, sleeve marks, and simple symbols | Very quick, but only works for bold silhouettes. |
| 24x24 | Shirt icons, stripes, initials, and small outfit details | Good for wearable art that should not take long to copy. |
| 32x32 | Larger logos, character marks, and detailed clothing panels | More readable detail, but cleanup matters more. |
Лучшие дизайны одежды для пиксельных сеток
В самых ярких выкройках одежды используются крупные читаемые формы. Эмблема на рубашке, состоящая из трех или четырех цветов, обычно будет выглядеть лучше, чем подробная иллюстрация с множеством оттенков.
Если вы конвертируете логотип, плотно обрежьте его и проверьте размеры 24x24 и 32x32, прежде чем переходить к окончательному шаблону.
Как сделать одежду читабельной
Проверьте предварительный просмотр в небольших размерах. Если дизайн по-прежнему понятен на холсте предварительного просмотра, у него больше шансов работать на одежде.
Не размещайте важные детали по краям сетки, если вы не уверены, что они не будут обрезаны или искажены игровой поверхностью.
Design Rules for Small Clothing Areas
Clothing art has less room for detail than posters or TV screens, so the best designs use one strong symbol rather than a full illustration. Think in terms of badges, stripes, initials, icons, or a single character mark.
Leave a little empty space around the design. A logo that touches the grid edge can look cramped after it is copied onto clothing, especially if the in-game surface curves or crops the artwork.
How to Test a Shirt Design Before Copying
Preview the grid at the size you expect to see in-game. If you cannot recognize the design when it is small, reduce colors, thicken the outline, or remove interior details before exporting.
Try a two-pass test: first export a simple 24x24 version, then compare it with a 32x32 version. Use the larger grid only if it adds readable information instead of extra noise.
Troubleshooting Clothing Edges
Jagged edges stand out on clothes because the design is usually seen as a single emblem. Clean the outer contour manually and remove stray pixels that sit just outside the main shape.
If diagonal lines look broken, use short stair-step patterns instead of scattered single cells. Consistent stair steps look intentional, while isolated pixels usually look like conversion mistakes.
Example Clothing Workflow
For a shirt badge, sketch the badge shape first, then add one internal symbol and one highlight color. If the design needs more than four or five colors to make sense, it may be better as a poster or TV screen grid.
For stripes or initials, copy the layout with a temporary high-contrast color before finalizing the palette. This makes spacing mistakes obvious and lets you correct the pattern before the real colors are in place.
Распространенные ошибки, которых следует избегать
- Using photo detail on clothes. Clothing art is small. Replace photo texture with a few readable shapes before exporting.
- Ignoring edge safety. Important marks near the border may look clipped. Leave space around logos and badges.
- Adding too many shades. Complex gradients blur on clothing. Use strong contrast and fewer colors for sharper results.
Связанные руководства
Часто задаваемые вопросы
Какой размер сетки лучше всего подходит для индивидуальной одежды?
Используйте размер 24x24 для простых знаков и 32x32 для более детального изображения одежды. Используйте размер 48x48 только в том случае, если дизайн требует мелких деталей.
Следует ли в пиксельной графике одежды использовать много цветов?
Обычно нет. Ограниченную палитру легче копировать, и дизайн одежды выглядит более четким.
Are photos good for custom clothes?
Photos usually need heavy simplification before they work on clothing. Convert the photo into a bold symbol or cropped face rather than trying to preserve every shade.
How much empty space should I leave?
Leave enough border space that the design does not touch the grid edge. This makes logos and badges feel cleaner when they are copied onto clothing.